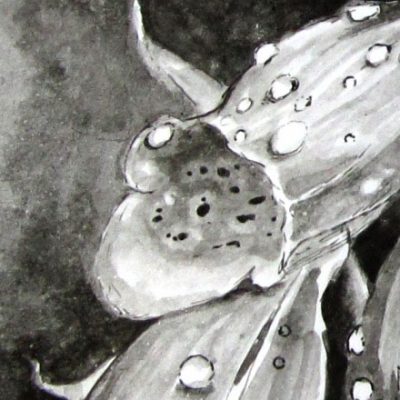
Archive for the ‘pen and ink’ tag
A dining room chair in pen and ink
As some of you will know, progress on the new drawing has been very slow due to my troubles with a frozen shoulder, which has made work extremely difficult. However, I thought I’d post some of the photographs I have of the most recent work on the dining room chair in the bottom right of the drawing. The picture above is a close-up of the back of the chair, to show the stipple detail of sky and chair. As you can see if you click on the thumbnail, I’m using a kind of pattern in the stipples which gives a nice texture to the sky. The chair is first stippled to give the tone, and then the woodgrain effect is added using small lines made with the Rotring pen. This can be seen in the upright on the far right of the chair back, and in the final picture at the foot of the post.
Click on the thumbnails for a closer look:
The pencil marks behind the chair are where the clouds will be. I pencil in the parts I want to be light, and stipple around them, removing the pencil and adding ink details later. Below is a photograph of a section of the drawing on the drawing table, which gives some idea of texture and scale. There is also a clue as to what is outside the window, the detail of which will be revealed in a future post.
Follow these link to see the overall design as well as earlier updates on this drawing and reference photographs. And go here to see more drawings in my gallery.
| Home | About the Artist | Contact | Galleries | Subscribe to Blog |
Magnifying glasses and lamps
Twenty years ago, when I first started doing the stipple drawings, I didn’t use a magnifier at all, and yet when I began again this year after such a long time, I found myself picking up a magnifying glass: not only had I a greater desire for finer detail, but no doubt my eyes are not what they were. So the first part of my current drawing was done using a hand-held magnifying glass in my left hand, while holding the pen in my right hand. Looking back now I wonder whether this hunching up over detail didn’t contribute to my painful frozen shoulder, but it felt comfortable enough at the time.
Then one of the readers of this blog wrote to me and asked why I didn’t use a magnifying light, and in fact I did have one, but unfortunately it wasn’t suitable for use with this drawing table and in this position in the room as there is no space to the left of the table. Although I used to use the lamp itself way back when I used to do these drawings, I could never get the magnifier into the correct position, even with a special bracket on my old drawing table. Here’s the lamp, which is not only really beautiful, but sits accurately in any position you care to put it in; truly a lovely piece of design and it’s a real shame I can’t use it at the moment. The only real downside to the lamp is that it’s terribly awkward to move around when not in use, and is quite nippy on the fingers! But despite that, I love it and have kept it for many years even when I was not drawing. These days it has a daylight bulb in it and is used for additional lighting at the table:
Recently I decided to purchase a new anglepoise lamp so that I could have my left hand free, and I decided on this one from the ‘daylight’ lamp company. The advantages over my old lamp are that it has a longer reach, which is really what I need, and has a clamp to attach it to the board, making it far more versatile in terms of positioning. The downside is that it’s not as easy to get it to actually stay in position, as it’s head seems a touch too heavy for the rest of it, and so positioning of the clamp is important, and I spend quite a bit of time moving my drawing around rather than the lamp. It did take a few sessions to get used to such a contraption in between me and my drawing, but once I got used to where to position everything, and the alarming size of my fingers under the magnifier, everything became a lot easier:
To follow the progress of this drawing, follow the tag for pen and ink drawings.
| Home | About the Artist | Contact | Galleries | Subscribe to Blog |
Progress on the pen and ink drawing of window and clouds
Another two weeks has gone by since I last posted an update, and as you may imagine, my feelings at the moment are that the progress is slow and painful. I spend most days with a magnifying glass in my left hand as I work gradually across the paper, going back and back again over clouds, deepening the shadow each time. I haven’t kept an exact tally on the hours I’m at the drawing board, or even the weeks now. Here are scans of the progress so far (click on images for detail).
The first section of the drawing was the quickest and easiest: the sky through the window (below) was based on some evening clouds I photographed out of my bedroom window, which for some reason became twisted up and not how I’d really imagined them. I knew I wanted them to be threatening, distorted and unusual, but they came out even more surprising. They remind me of something seen through a microscope, or telescope.
I’m still not certain what I want to have through the bottom half of the window. My initial ideas were of hands pushing against the panes, and even to use real fingerprints to form clouds. I have left them blank for the time being and it will become clearer to me later in the process what needs to go there.
The skies around the window (below) are a different matter. They’re made up of clouds I photographed on several days this summer, some on Clee Hills where I took the initial photographs of the dining chair, some from my garden. The process with these clouds, as they are so detailed, is very slow and quite agonising some days. The good news is that my headaches have actually reduced over the past months, and so I’m fairly certain they’re not down to eye strain, which was a concern of mine initially. Anyway, here are some closer details of these clouds, none of which are anywhere near completion yet.
Here’s an idea of what I see when I’m drawing (below). Some days I do wonder why I’ve set myself such a task: why I don’t just pick up a pencil and do things that way. It’s quite difficult to give an impression of what it’s like sitting here and being absorbed into a world of clouds upon clouds. It’s irritating, and compulsive. And sometimes it’s even satisfying… but I haven’t got to that stage with this drawing yet. There’s still far to far to go, and what I mainly see is white paper and things that need fixing.
| Home | About the Artist | Contact | Galleries | Subscribe to Blog |
Inking the summer skies
A week after my previous post and the top two panes of the window are now more or less complete - I won’t know whether more inking is needed on that area until I’ve completed the skies outside the window, the early stages of which you can see in today’s pictures.
The two images on the left show the development of the summer skies: far more shading is needed at the moment, especially within the cloud which needs a lot more depth. The picture on the right shows a close-up of the stipples in this area. Click on the thumbnails for a closer look.
At this stage the early worries about whether or not I’m putting too much ink on and destroying everything are gone, and the biggest issues are different. The main thing to deal with is the eye strain, looking at something so small through a magnifying glass, and the frustration of slow progress while every stipple needs to be in almost exactly the right place. It has been a long time since I drew anything quite so detailed, and I had forgotten just how demanding it is. Still, it’s begun now and I am anxious to find out how it’s going to look.
The one thing I’m fairly pleased with at this stage is the overall composition, and I’m glad I spent so long getting that right. At the moment I’m uncertain exactly what I’m going to put in the foreground, but my early idea is to put in floorboards and perhaps mosses. I will have to take more photographs for that stage. What I’m doing at the moment is continuing across the top part of the summer skies, while darkening the clouds on the left, but not too much, as I want there to be a complete contrast between what is through the window, and what is around the window.
| Home | About the Artist | Contact | Galleries | Subscribe to Blog |
Beginning to ink what’s through the window
As you may have seen in this earlier post on the dolls house window drawing, I’ve been working on the ideas for a new set of pen and ink drawings for some time now. I’m now at the stage where the first composition I have in mind for this project has been sketched out in pencil, and I’m beginning to ink things in. The essential thing for me at this point is to get the values right - since the appearance of everything will depend on contrast with it’s neighbour. The main issue is that with this drawing technique everything takes so long, and it is so intense a process, the fear is that I will put too much ink on and destroy everything so far. Unlike working with paint, there is no real way to remove the ink, or to lighten anything once it is inked. As time goes on, I will see whether these clouds through the window are ‘right’ or whether they’re not.
Here is a small section of the window, so that you can see some of the process (click on the images for a closer look):
I thought I’d also include a couple of shots of the studio. As you can see, I like to work in quite low lighting conditions, even closing the blinds during the day at times. I also love to ink by night. I think it is the combination of the quiet and lack of distraction, with the tiny pool of light which concentrates my mind onto the small worlds I am creating.
In the shot on the left you can also see some of the photographs I’m working from. These include those I took on Clee Hill the other week, as well as ones taken in my house, and skies from the decking outside my studio, which has proven to be a great place to photograph clouds!
| Home | About the Artist | Contact | Galleries | Subscribe to Blog |
Dolls house window
Someone today described my earlier work ‘A House in Cradley‘ as an “inside-out house”, and this could easily describe the idea I have for my new drawings. I thought I’d share a little of the work in progress on this one. I don’t tend to do too many preliminary sketches, and jot as many ideas down in words as I do in images. Here (below, left) are some of my notes relating to the new project.
Looking back through my diary I see that the idea has been with me for a few months now, in various forms. It’s a project which has had to stay on the back burner while I set up my studio, but it’s nice to have it there simmering away and developing over time. There are pages and pages of these jottings, here are a couple of them:
I’m currently working on the window which will open into the sky on the new drawing (right hand photos). This is one of the sketches for the window: as you can see I’m using a dolls house window as a model here, but I’ll probably also be photographing some of the sash windows in my house, too. Somewhere in there I want to get lots of woodgrain, and perhaps some fingerprints too, but I’m not quite sure how yet.
Given the amount of material I already have in my art diary it’s very likely I’ll be working on variations of this drawing for a considerable time, and produce many works from it. At the moment my plan is to make the first piece a stipple drawing, but I am considering also sketching in the window in the sky with pen and ink, as well as other ideas. I’m also planning on building some ’sets’, using dolls house furniture and dolls house windows, the ideas for which you may just be able to make out in the pages from my diary.
To see some of the earlier photographs which will be used in this project, take a look at the chair on Clee Hills post.
| Home | About the Artist | Contact | Galleries | Subscribe to Blog |
Working with Rotring Rapidograph pens
As I’ll soon be re-photographing my work for my new online pen and ink drawings gallery, today I’m beginning to touch a few of my drawings up. Just small things that I feel need darkening here and there: some clouds to make heavier, some skies to deepen. So for the first time in a while, out come the pens.
I had a little burst of buying new Rotring Rapidograph pens last year, just to make sure I had some in reserve. So I needed to check what I have, and see what needs cleaning or replacing. Sometimes it seems a nib gets a bit ‘gushy’ (developing a little globule of ink on the end if you pause too long during stippling) and I don’t know what to do other than replace it and keep the ‘gushy’ one in reserve. I also have a couple of nibs that have blocked, and I really need to buy a cleaner unit. In the past I’ve always relied on a lot of shaking and even sucking the end of the pen… but that usually gets you a mouth full of ink if you’re not careful!
Here’s the current collection (above left): ,13 and 0,5 (which I’ve been using most often in the past couple of years), up to 1,0, which I almost never use. Today I ordered some ,25 and ,35 which I used to use more in the past and will be using for the new projects. I’m going to be recording the progress of the new work here in the blog, from first ideas to photography to drawing. So if you would like to keep up to date with my progress, please subscribe and you’ll get regular updates (one email a day on any day that I update the blog)!
So today I’ll be concentrating on sharpening up the detail in this drawing (below), and later in the week I’ll be photographing it ready to upload it into the gallery.

| Home | About the Artist | Contact | Galleries | Subscribe to Blog |
Pen and ink drawing
Born in Birmingham, I live and work in Stourbridge, England. As an artist, I work primarily in pen and ink, in a realist drawing style, and the themes of my work are memory, remains, and place. My drawings are composed of many thousands of dots of ink or stipples, and other small marks, and can take hundreds of hours to complete.
You can view a selection of my drawings in the galleries section, or read more about me and the way I work in the about the artist section, which covers the stippling technique. You can also keep up to date with what I’m working on in my art blog, which you can subscribe to by clicking on the “Subscribe” button on the navigation on the right, or via the subscribe page. Please visit the contact page to get in touch.
| Home | About the Artist | Contact | Galleries | Subscribe to Blog |


